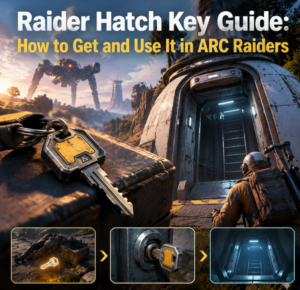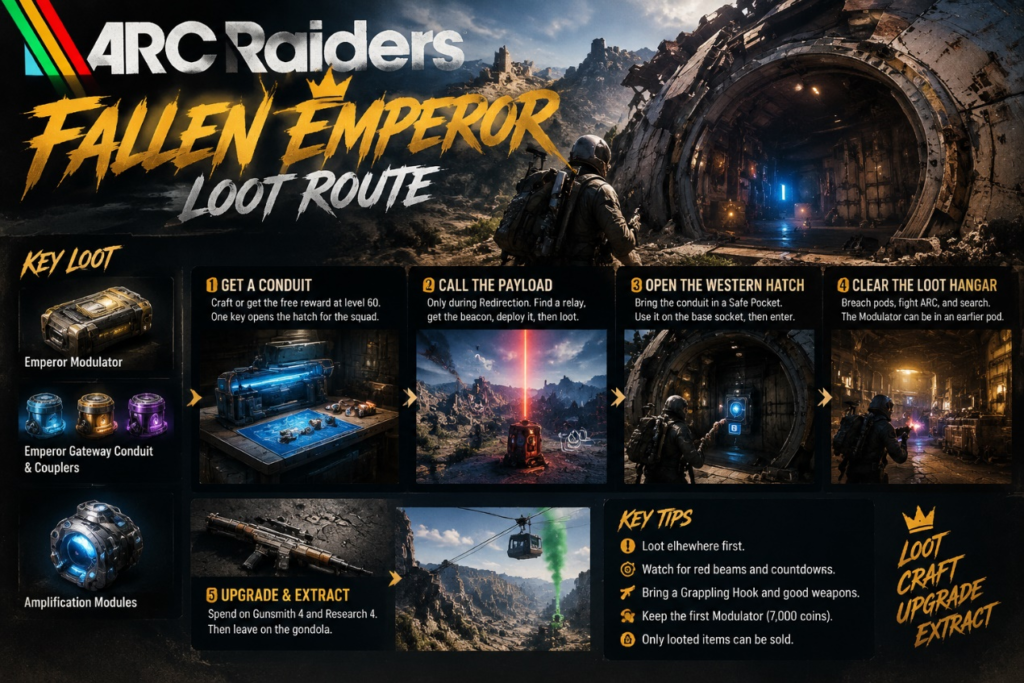
The Emperor Modulator comes from containers inside the Fallen Emperor on Pendola Pass, not from finishing the last room. Craft an Emperor Gateway Conduit, spend it on the base hatch, then search breachable pods on the climb and the extra racks in the loot hangar. Keep the first Modulator for Gunsmith Level 4. Only loot you extract can be sold for ARC Raiders Coins.
Get a conduit before you queue
The round hatch stays locked until someone uses an Emperor Gateway Conduit. That use consumes the key. One key opens the hatch for the squad, so a group does not need three.
- Repeatable: learn the blueprint, then craft at Workbench 1 with 1 ARC Conductive Coupler, 1 ARC Insulated Coupler, and 1 ARC Plated Coupler.
- One-time: claim the free Frozen Trail Reward Pass reward at level 60. That is a finished key, not the blueprint.
- Do not sell your only key. The crafted conduit sells for 1,000 Raider Coins and does not recycle. Selling it just locks the next run.
Belly of the Beast still needs you inside the wreck. Shani gives a Grappling Hook to use on that quest, and the completion reward includes a Snap Hook. Tracks of the Beast pays a Grappling Hook when you finish it. Neither quest teaches the conduit recipe.
Call the payload during Redirection
Couplers and the blueprint come from a Harvester Payload. Queue Pendola Pass only while Redirection is the active condition. A normal Pendola raid will not turn the relays on, and Redirection also shuts off Flash Freeze.
- Loot elsewhere first. Damaged Emperor Relays start offline and begin switching on around 25 minutes remaining, alone or in groups.
- Go to a relay with a red beam and a countdown icon. Search it for an Emperor Beacon. The beacon is Epic, weighs 2, and stacks to 3.
- Deploy it on open ground near cover, then get under a roof. Falling debris damages health and shields, and the beam is visible across the map.
- Breach the large upright container. Smaller broken pieces are mostly ordinary ARC parts.
- Extract, learn the blueprint in Speranza, and craft from your own stash. You cannot craft this mid-raid.
Warning: A lit relay is bait. In a hostile lobby, do not loot the payload in the open. On a quiet lobby, sit near two or three relays and take the beacon as soon as one lights up.
Pocket the blueprint first, then one of each coupler if your augment has the slots. Couplers sell for only 100 Raider Coins. The unlearned blueprint sells for 5,000, which is a bad trade if you still need keys. A destroyed Surveyor can also drop the blueprint. That is a side chance, not the farm.
Open the western hatch
The wreck is on the western side of Pendola Pass, by Almatera Village and Piazza della Rupe. The Reckless Transceiver sits in its shadow.
- Bring the conduit in a Safe Pocket. A free loadout will not save a Legendary drop.
- Use it on the socket at the base. The prompt asks for 1 Emperor Gateway Conduit.
- Enter through the round hatch. The exterior leg can be climbed with ziplines, but that route is not the dungeon and does not spend a key.
Read the room
The ground floor and the loot hangar stay in place. The trials between them change order, so a path from an old raid can dead-end. A large door with two white lights is the way forward. A yellow-lit door can drop you back at the base elevator or outside.
| Room | What you see | What to do |
| Entrance tunnel | Blue electrical boxes, then a Hydra | Shoot a box, cross while it is discharged, fight the Hydra from cover |
| Elevator | Yellow nodes on the lift and nearby walls | Destroy those nodes, ride up, breach the pods at the stops |
| Gas and crushers | Stamina drain, then closing walls | Walls start when someone steps onto the floor. Wait in the center dip, then cross in the gap |
| Lasers | Rotating beams | They can down you. Watch one cycle and use containers already in the room to block a line |
| Shaft | Cutouts or a moving container | Drop one level at a time. Discharge anything you will land on |
| Open maze | Four yellow nodes | Destroy all four. Pops and Fireballs can chase under the walls |
| Partition maze | Round doors, no node set | Find the single unlocked exit |
A Grappling Hook is the tool for these shafts. A Snap Hook helps a bad jump, but it is not a substitute for the climb. Bring an anti-ARC gun for Hydras, a steady gun for nodes, and enough shield chargers and heals to recover between rooms. Hydras are not a heavy-ammo refill.
Clear the loot hangar before you search it
This room has the best concentration of Emperor containers. The Modulator can still be in an earlier pod, so breach round panels on the way up.
- Enter through the huge opening. The yellow-lit door beside it goes back to the base elevator and lets a late arrival skip the trials.
- Ride the swinging piece down beside the collapsed container. Do not take the full drop.
- From cover, shoot six yellow nodes, three on each side.
- The roof opens. Small ARC and a Vaporizer can come in. Fight from under the collapsed container, then search.
- Wall canisters extend after the nodes are down. Leave a flashing orange pod once you already have the ARC Raiders Items you came for.
- Both hangar doors can exit. Do not sprint the first new doorway while ARC are still shooting.
Amplification Modules, from Mk. I through Mk. V, drop in these containers and also on the ARC Frigate. The Modulator does not come from the outdoor payload, and clearing the hangar does not guarantee one.
Pocket, sell, or leave it
| Item | Decision |
| Emperor Modulator | Keep the first. It sells for 7,000 Raider Coins, does not recycle, and Gunsmith Level 4 needs 1 |
| Matching Amplification Module | Keep the Mark your gun uses. Mk. I is Common, Mk. V is Legendary. The Mark follows base rarity, not upgrade tier |
| ARC Data Module | Keep until Research Station Level 4 is done. That upgrade takes 3 |
| Radial Press and Magnetic Accelerator | Stash them. The same Gunsmith upgrade takes 3 of each |
| Extra couplers | Keep until the next conduit is crafted |
| Trinkets and spare ARC scrap | Sell after a safe extract |
Spend the extract on Gunsmith Level 4
The Outpost has to reach Level 4 before Gunsmith Level 4 and Research Station Level 4 unlock. That Outpost step takes 40 Sheet Metal, 3 Laser Levels, and 3 Insulation Rolls.
Then upgrade the Gunsmith from Level 3 with 1 Emperor Modulator, 3 Radial Presses, and 3 Magnetic Accelerators. Most Radial Presses are in Almatera Station, on the upper shelves and in the parked train cars. Storm Huts are the backup, and they open in Flash Freeze, not during Redirection. Magnetic Accelerators can be crafted at Refiner Level 3 with 2 Advanced Mechanical Components and 2 ARC Motion Cores.
Research Station Level 4 is a separate gate for amplified perks. It takes 3 Thermal Shakers, 3 ARC Data Modules, and 1 Frigate Inductor. Putting a module on a gun is not the same step. Bring a normal gun to Tier IV first. Aphelion, Equalizer, and Jupiter have no ordinary tiers and can be amplified as they are. One matching module is the amplify cost.
Leave on the gondola
Call a Ballistic Gondola from a transceiver, then move to the landing mark. It comes down away from the tower, marked by the map icon and green smoke. Each call has three pods. The Reckless Transceiver is the closest exit and the one other Raiders watch. Use it only when the approach is clear.
If the Modulator did not drop, leave once heals or the raid timer get thin. Banked modules and data still count. A dead raid sells for nothing.